
This article contains a step-by-step guide walking you through how to replace a battery for the V2.1 FitMachine sensor.
If you have any questions or concerns, please don't hesitate to reach out to MOVUS Support through any of the methods listed here.
Instructions
- Using a T10 Torx screwdriver, unscrew the 3 screws and remove the base. Be careful not to lose the 3x screws and 3x washers for each hole.
- Using a ‘hook-shaped’ tool, remove the black mid-section from the lid by pulling it out as shown in the photograph. Please do not pull on the PCB itself, there is a gap underneath the PCB which will allow you to pull on the mid-section chassis.
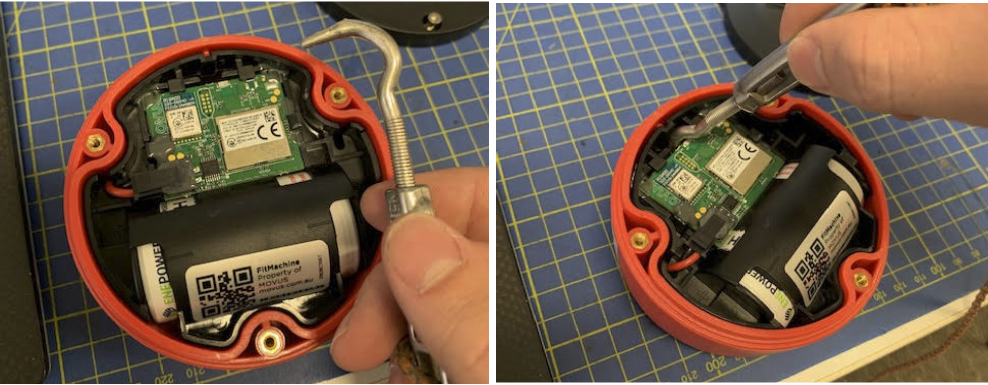
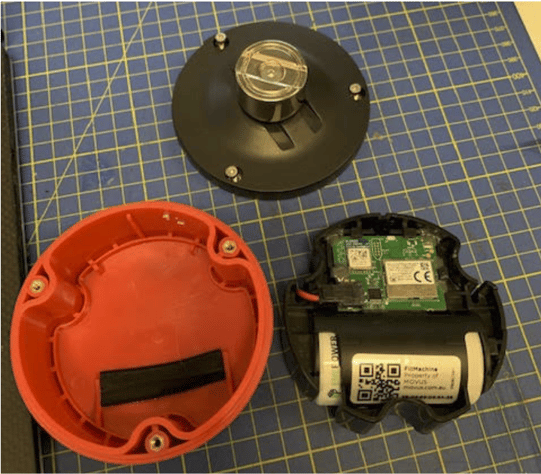
- Pull the battery out from its holder, and disconnect the battery from the PCB using the battery clip.
Tip: It helps to mark the dead battery with an X to prevent accidental re-installation.
- Connect the new battery using the clip. Thread the wires down the side of the mid-section, and push the battery into the battery holder.
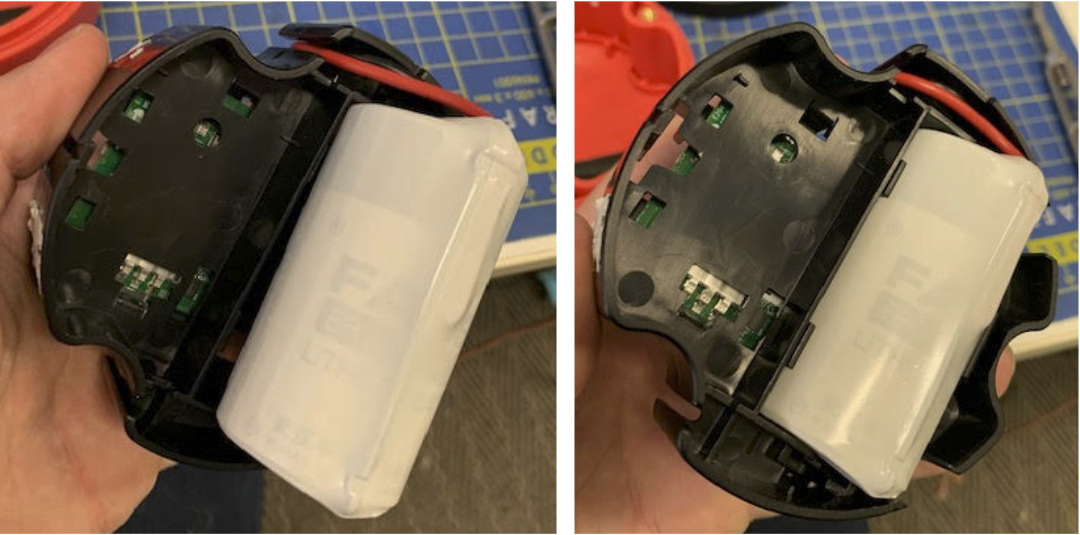
- Place the mid-section back into the lid with the PCB facing towards you as per the photo below.
- Secure the base to the lid by tightening the 3x mounting screws to a hand-tight torque. Ensure you do not screw too tightly as this may cause damage to the base.
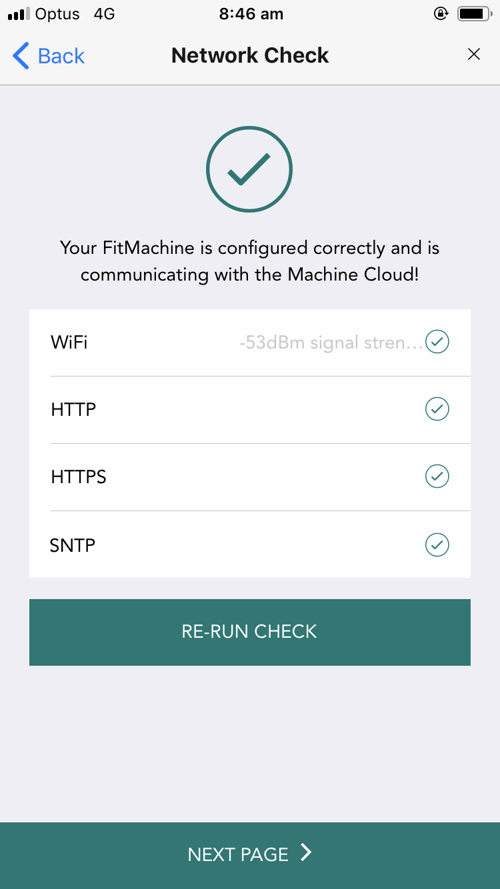
- Using the FitMachine Mobile App, run a Network check to confirm that the FitMachine is once again working before reinstalling it on your equipment. You may need to run the Network Check a couple of times and wait 1 minute before the sensor responds as it will be searching for, and potentially updating its firmware. The FitMachine does not have to pass the network check at this point, we're just looking for it to broadcast over Bluetooth.
- Please dispose of the discarded battery in an appropriate battery disposal container or battery recycling facility. Please do not return the dead battery to MOVUS.


