
This article explains how to differentiate between different FitMachine Hardware versions, so you can order the correct battery replacement.
There are currently six standard FitMachine hardware revisions utilised by MOVUS. These include:
These different versions have been developed over time to cater to changes in battery size, the availability of required hardware parts, and to allow for distribution to different countries and locations. For example, if you are based in Australia, you should have a v3.2.0 FitMachine.
Although not something you usually need to be aware of, when it comes time to replace your FitMachine's battery, it's important to understand which version you have so that you can order the correct replacement.
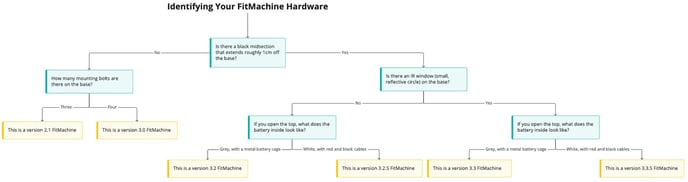
You can search for the FitMachine's version on your dashboard, under the Sensor Admin page. However, as versions 3.2.5 and 3.3.5 aren't identifiable via this page, to help you distinguish between them we have (1) created an identification flowchart, and (2) listed physical descriptions of each version, as seen below.
Identification Flowchart
Version Descriptions
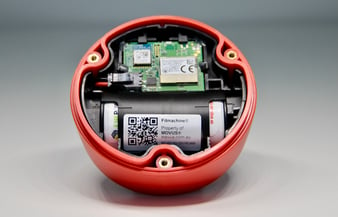
Version 2.1
 |
 |
 |
 |
Features
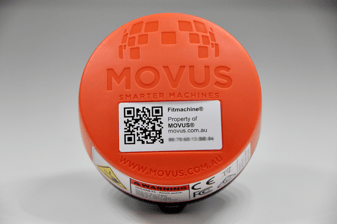
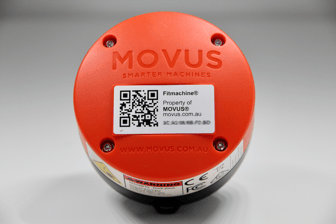
- Salmon-red colour
- No extended black midsection
- Three mounting bolts on the black base
- No mounting bolts on the orange lid
- The internals are all attached to a black internal chassis, with the battery facing the orange lid.
- The D-cell is covered in a white sleeve with an attached red and black cable.
- Voltage is around 3.6V for a healthy battery and below 3V for a dead/dying battery.
Version 3.0
 |
 |
 |
 |
Features
- Safety orange colour
- No extended black midsection
- Four mounting bolts on the black base
- No mounting bolts on the orange lid
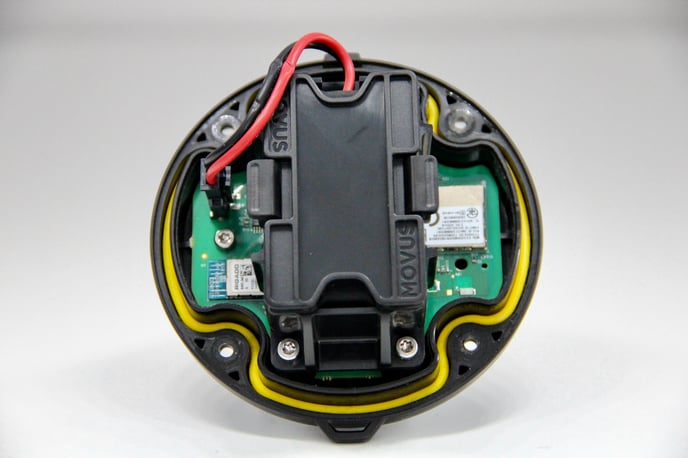
- The AA-battery pack is secured in a black battery bucket and has an attached red and black cable.
- Voltage is around 7.2V for a healthy battery and below 6V for a dead/dying battery.
Version 3.2
Features
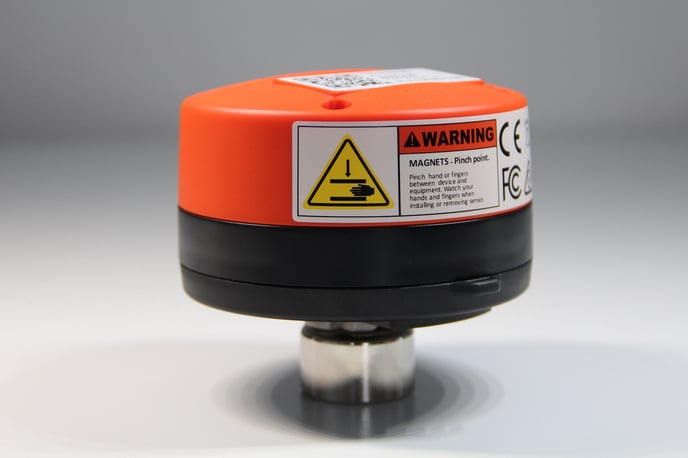
- Safety orange colour
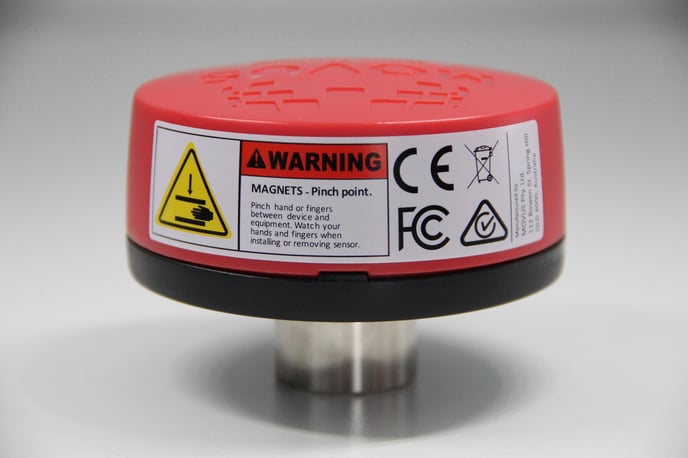
- Contains an extended black midsection
- Four mounting bolts on the black base
- Four mounting bolts on the orange lid
- This design uses a D-cell which is grey and encased in a metal battery cage.
- Voltage is around 3.6V for a healthy battery and below 3V for a dead/dying battery.
Version 3.2.5
 |
 |
|
 |
Features
- Safety orange colour
- Contains an extended black midsection
- Four mounting bolts on the black base
- Four mounting bolts on the orange lid
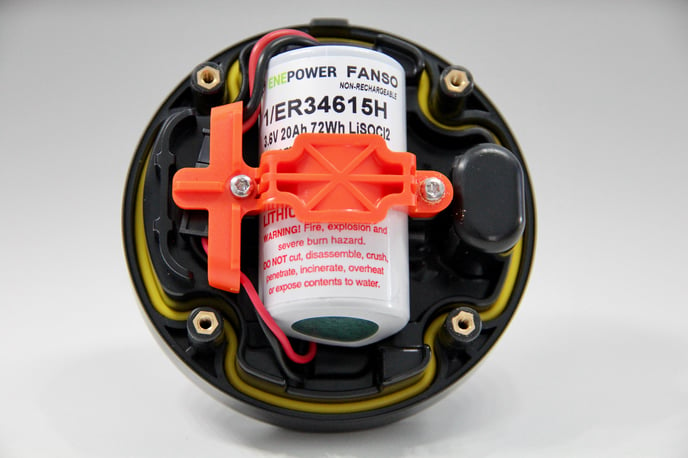
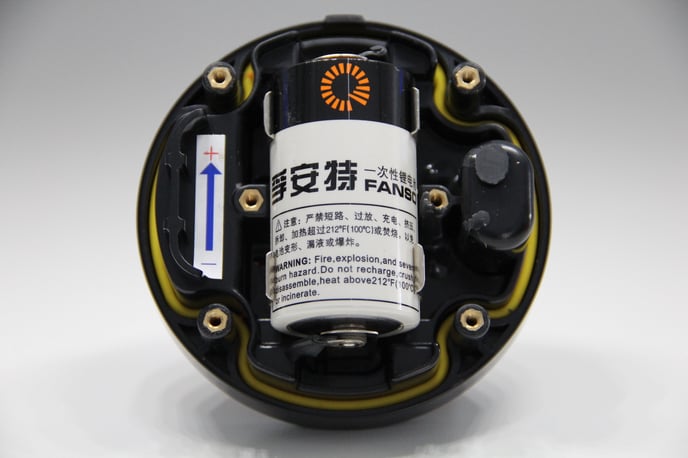
- The D-cell is covered in a white sleeve with an attached red and black cable.
- Voltage is around 3.6V for a healthy battery and below 3V for a dead/dying battery.
Version 3.3
 |
|
|
|
 |
Features
- Safety orange colour
- Contains an extended black midsection
- Four mounting bolts on the black base
- Four mounting bolts on the orange lid
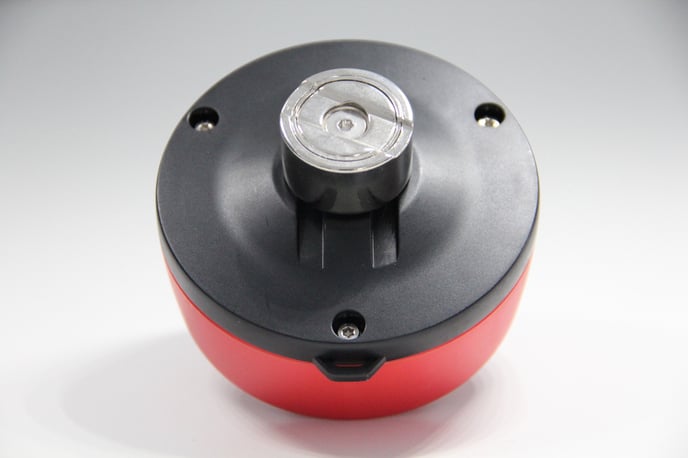
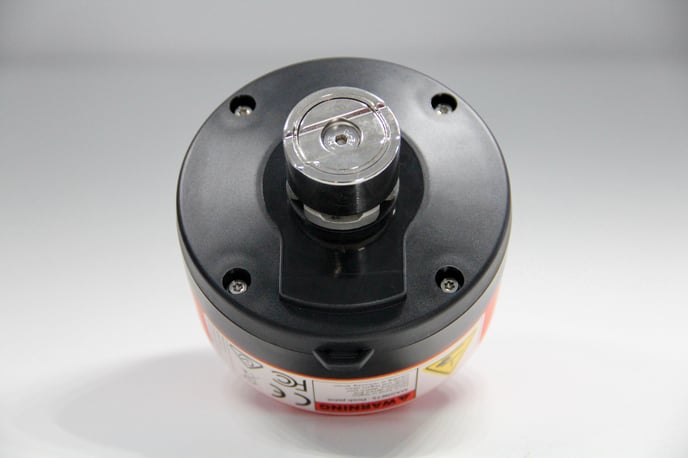
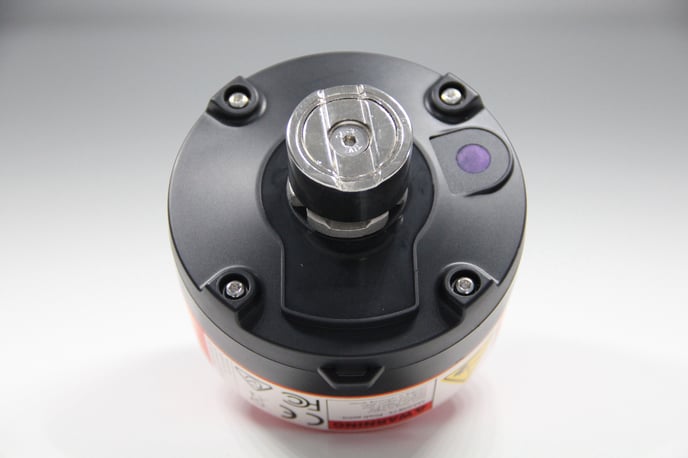
- An IR window (small, reflective circle) is on the base of the FitMachine.
- This design uses a D-cell which is grey and encased in a metal battery cage.
- Voltage is around 3.6V for a healthy battery and below 3V for a dead/dying battery.
Version 3.3.5
|
|
 |
|
Features
- Safety orange colour
- Contains an extended black midsection
- Four mounting bolts on the black base
- Four mounting bolts on the orange lid
- An infrared (IR) window (small, reflective circle) is on the base of the FitMachine.
- The D-cell is covered in a white sleeve with an attached red and black cable.
- Voltage is around 3.6V for a healthy battery and below 3V for a dead/dying battery.
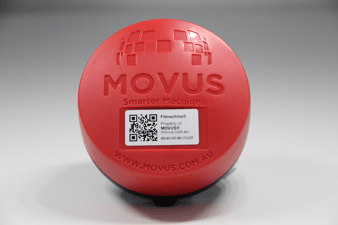
Comparative Photos
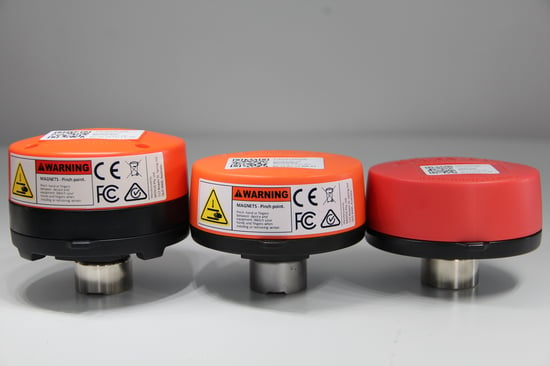
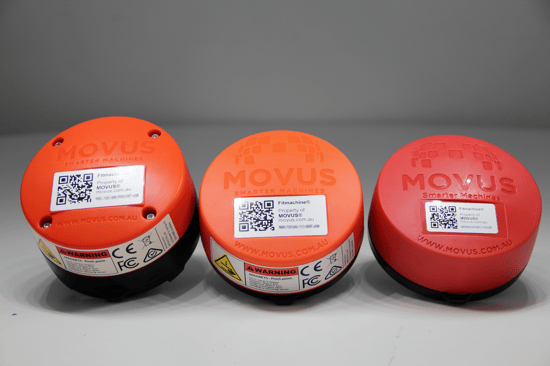
Pictured, from left to right: V3.2/V3.3, V3.0, V2.1
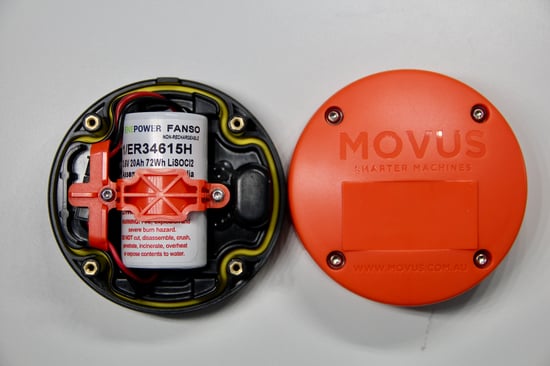
How do I open the top?
In order to distinguish between the V3.2 and V3.2.5, and between the V3.3 and V3.3.5, you will need to open the top of the FitMachine, as no differences are visible on the exterior.
Please only remove the lid if the FitMachine's battery is completely dead, and it is safe to remove the FitMachine from your asset to be placed on a flat surface.
If the FitMachine still has battery remaining, please do not remove the FitMachine or its lid. Moving the FitMachine will interfere with its monitoring.
Where possible, to remove the lid, you will need a T10 Torx Drill bit to loosen the four mounting bolts, spinning them counter-clockwise. Once loose, you can lift the lid off the FitMachine to reveal the battery inside. You do not need to remove the screws from the lid, they only need to be loosened.
To re-attach the lid, place it back onto the FitMachine and tighten using the same T10 Torx Drill bit, spinning the screws clockwise. Tighten these to hand-tight.
---
Thanks for reading. As always, if you have any questions or concerns please reach out to MOVUS Support here.